Contents
the email tool that makes email marketing simple


Manage Subscribers and Bulk Actions
Published: · Last updated: · By Marcus Biel
In brief
Learn how to review subscriber reports, search and filter contacts, add or remove tags in bulk, import, export, and safely delete subscribers.
Before you start
- A Maildroppa account
- At least one subscriber or an import file
- The fields or tags used to organize the list
Expected result
The intended subscribers are selected and their profile data, status, fields, or tags reflect the completed action.
Troubleshooting
- If a bulk action is unavailable, verify that at least one eligible subscriber is selected.
- If an imported value is missing, compare the source column with the mapped subscriber field.
The Subscribers page is the central place for managing the people in your Maildroppa account.
You can review the development of your confirmed audience, search and filter the subscriber list, open an individual profile, add new contacts, import a file, export the complete list, add or remove tags from selected subscribers, and delete subscriber records.
Related account settings are covered in Set the Subscriber Language and Managing Your User Profile.
This guide explains the report and every current list action. It also explains the difference between actions that affect selected rows and actions that affect every subscriber in the account.
Opening the Subscribers Page
Select “Subscribers” in the main navigation.
You can also open the page directly at:
https://app.maildroppa.com/subscribers
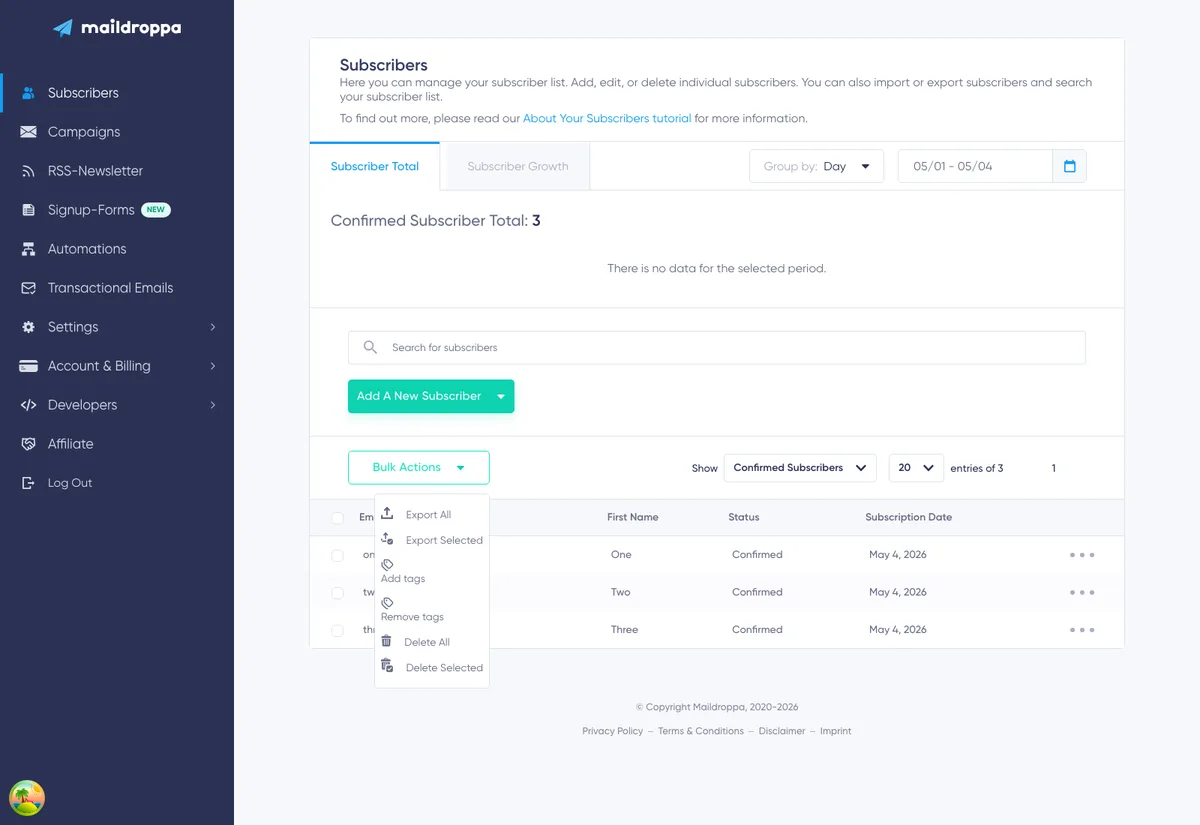
The page has two main areas:
- The Subscriber Report at the top shows how your confirmed audience changes over time.
- The subscriber table below the report lets you find and manage individual contacts or perform bulk actions.
Understanding the Subscriber Report
The report always shows the current “Confirmed Subscriber Total” above the chart. This is the number of subscribers who currently have the Confirmed status.
The chart has two tabs: “Subscriber Total” and “Subscriber Growth”. Both tabs use the same date range and “Group by” controls.
Subscriber Total
The Subscriber Total report shows the number of confirmed subscribers over time.
When the report is grouped by Day, each point represents the confirmed total for that day. When you group several days into a Week, Month, Quarter, or Year, Maildroppa displays the average of the daily confirmed totals in that period. This gives you a clear view of the overall size and long-term direction of your confirmed audience.
Use this report to answer questions such as:
- Is the confirmed audience growing over time?
- Did the subscriber total fall during a particular period?
- Is the list now larger or smaller than it was in an earlier month or quarter?
Subscriber Growth
The Subscriber Growth report shows status changes recorded during each selected interval.
The main series represents the change in confirmed subscribers. Move the pointer over a chart entry to see the available breakdown for Pending, Unsubscribed, Bounced, Blocked, and Deleted subscribers as well.
This tab is useful when you want to identify a particular day, week, or month in which many contacts joined, unsubscribed, bounced, were blocked, or were deleted.
The growth report records movements during a period. The total report shows the size of the confirmed audience. Use both reports together when investigating an unexpected change.
Choosing the Grouping Interval
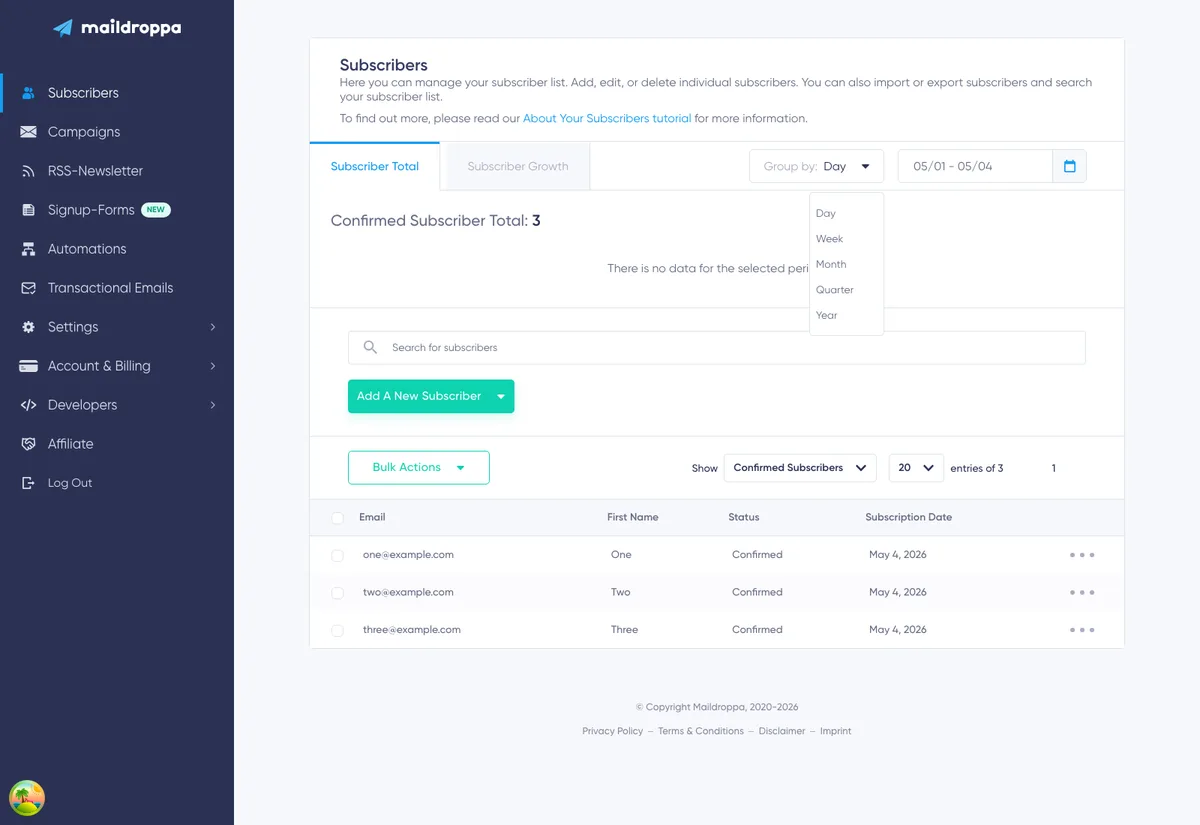
Open “Group by” and select one of these intervals:
- Day
- Week
- Month
- Quarter
- Year
A short date range is usually easiest to read by Day or Week. Month, Quarter, and Year are better for longer-term trends.
Weekly grouping follows the locale saved in your Maildroppa user profile. This is important because the first day of the week differs between locales.
Choosing the Date Range
Use the date control to select the first and last day of the report.
Report data starts on the date your Maildroppa account was created and ends on the current day. If your selection begins before account creation or ends in the future, Maildroppa adjusts the displayed period to the available range. If the entire selected period is outside that range, the chart has no data to display.
If you select only one date before closing the calendar, Maildroppa uses that day as both the start and end date.
Understanding the Subscriber List
The table initially shows Confirmed Subscribers, with the newest records first.
Each desktop row contains:
- First Name
- Status
- Subscription Date
- A checkbox for selected bulk actions
- A three-dot menu for editing or deleting that subscriber
On smaller screens, the same information is presented in compact subscriber cards.
Click the email address or another linked value in a row to open the Subscriber Details page. The “Edit” action in the three-dot menu opens the same page.
The individual profile lets you manage the subscriber’s fields, customer-created tags, and status. For an existing subscriber, it can also show stored marketing permission, internal notes, and subscriber activity. Read the Subscriber Details guide for a complete explanation.
Searching for a Subscriber
Use “Search for subscribers” above the table to find a subscriber by email address.
The current search matches the beginning of the email address. For example, searching for alex can find alex@example.com, but searching only for example.com does not find that address because the matching text is not at the beginning.
The search is applied together with the selected status filter. If the table is showing Confirmed Subscribers, a matching Pending subscriber does not appear until you change the filter to Pending Subscribers or All Subscribers.
Clear the search field to return to the complete list for the selected status.
Filtering by Subscriber Status
The status selector above the table lets you choose which subscribers are displayed.
All Subscribers
Shows subscriber records from every available status in one list.
Confirmed Subscribers
Shows contacts who completed confirmation or were added with the required marketing permission. This is the default view.
Pending Subscribers
Shows contacts who started a signup but have not completed confirmation.
Unsubscribed Subscribers
Shows contacts who opted out of marketing emails or were otherwise given the Unsubscribed status.
Cold Subscribers
Shows inactive contacts whose lack of engagement caused them to be classified as Cold. Maildroppa suppresses inactive statuses from ordinary campaign sending.
Bounced Subscribers
Shows contacts whose address produced a permanent delivery failure, such as a hard bounce.
Soft Bounced Subscribers
Shows contacts whose temporary delivery failures reached the configured safety threshold.
Blocked Subscribers
Shows contacts who were blocked because a receiving server blocked the sender or message, or because the contact was blocked manually.
For more information about inactive contacts and automatic list protection, read the Deliverability and List Hygiene guide.
Changing Pages and the Number of Rows
At the right side above the table, you can show 20, 50, or 100 entries per page.
The page controls let you move to:
- The first page
- The previous page
- The next page
- The final page
The total number of matching entries is displayed next to the page-size selector.
Selecting Subscribers for Bulk Actions
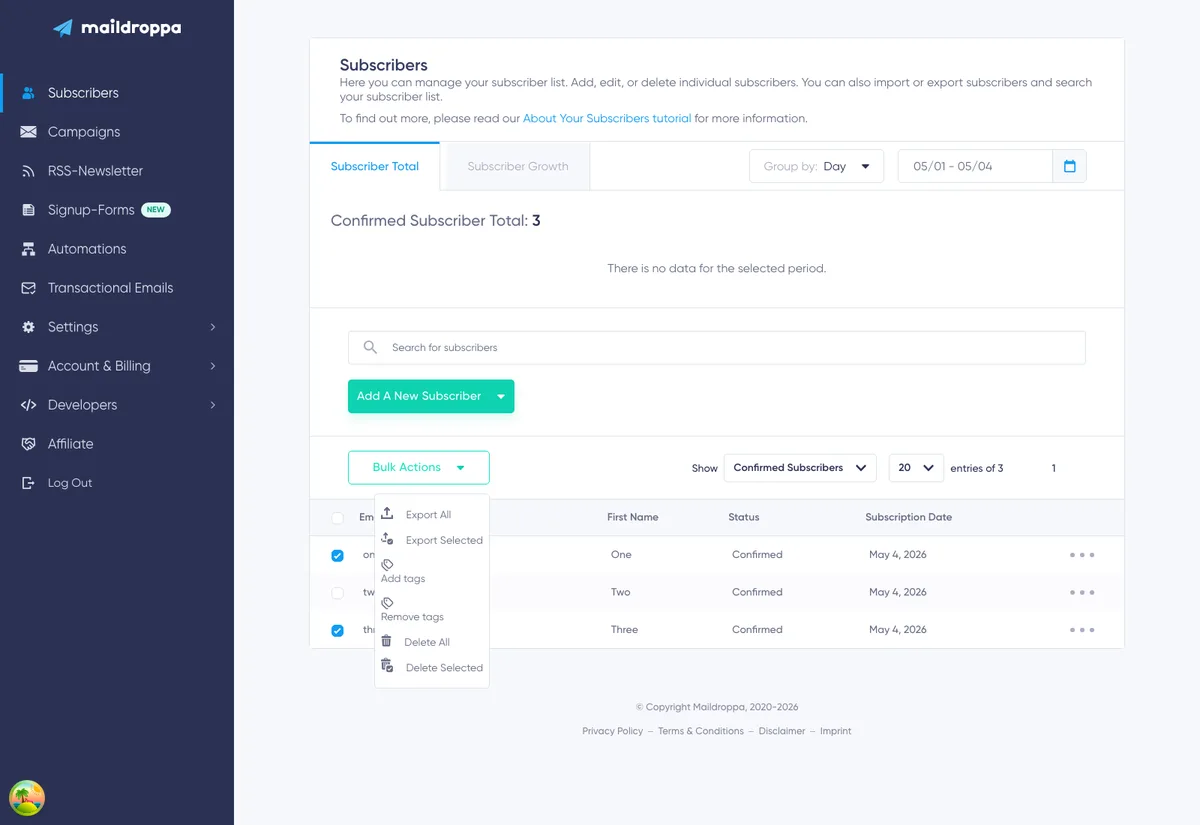
Select the checkbox at the beginning of a row to include that subscriber in a selected bulk action.
The checkbox in the table header selects all subscribers currently shown on that page. It does not select every matching subscriber on all pages. If you need to work with more visible rows at once, change the page size to 50 or 100 before making the selection.
Moving to another page or starting a new search clears the current selection. As a safe habit, apply the required status filter and search first, then select the final rows and open “Bulk Actions”.
The Bulk Actions menu currently contains:
- Export All
- Add tags
- Remove tags
- Delete All
- Delete Selected
“Add tags”, “Remove tags”, and “Delete Selected” use the checked rows. “Export All” and “Delete All” apply to the whole account and are not limited by the current search, status filter, page, or row selection.
Adding Tags to Selected Subscribers
Use “Add tags” when the subscribers you want to organize are already visible in the table.
To add tags:
- Apply the required status filter or email search.
- Select each subscriber you want to update, or use the header checkbox to select the current page.
- Open “Bulk Actions”.
- Select “Add tags”.
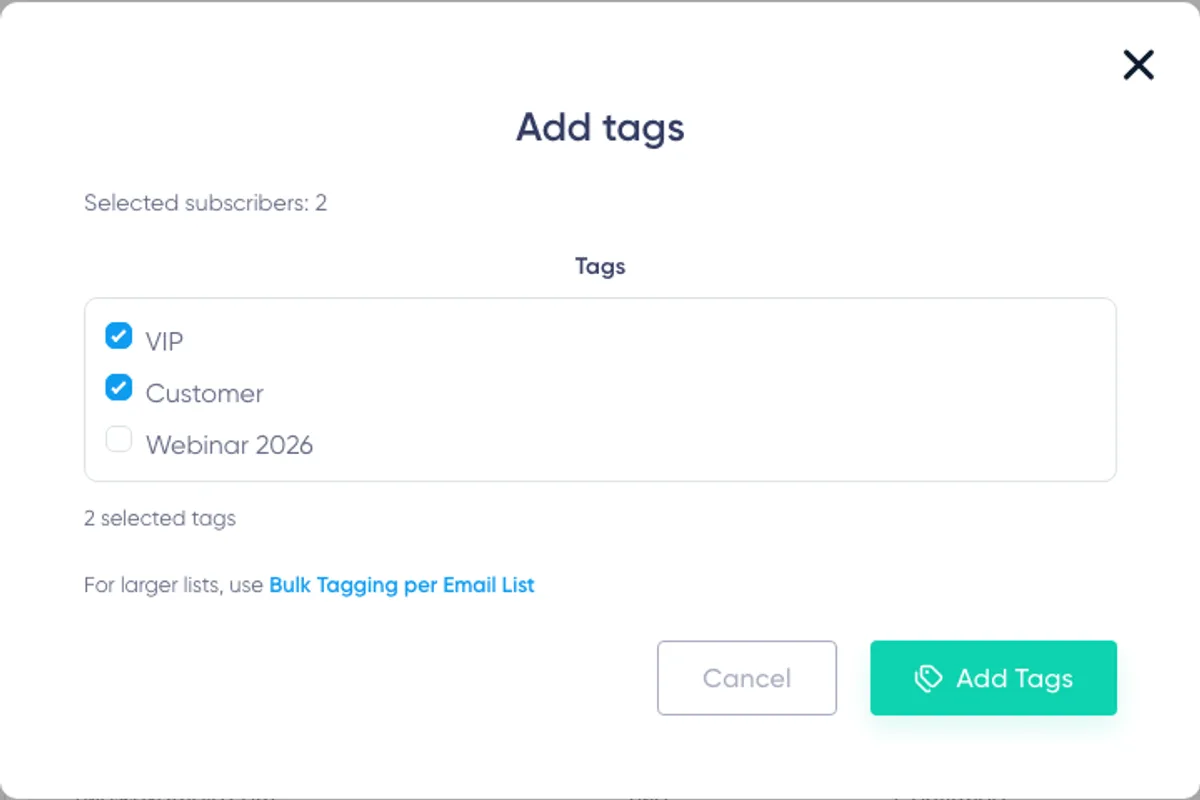
- Select one or more tags.
- Click “Add tags”.
The dialog shows the number of selected subscribers and lets you choose several tags in one action.
Only active, customer-created tags are available. System Tags and archived tags are not shown because they cannot be assigned manually from this action.
Only Confirmed subscribers can receive new tags through bulk tagging. If the selection contains Pending, Unsubscribed, Cold, Bounced, Soft Bounced, or Blocked subscribers, Maildroppa skips those records.
For every eligible subscriber, Maildroppa adds only the selected tags that are missing. It does not create duplicate assignments. A subscriber who already has all selected tags is counted separately in the result.
After the action, Maildroppa refreshes the table, clears the selection, and reports:
- How many subscribers were tagged
- How many already had all selected tags
- How many were skipped
Important: Adding a tag through a customer bulk action can start an active Automation that uses “Tag is Added” as its trigger. Review relevant Automations before applying tags to a large group.
Removing Tags from Selected Subscribers
Use “Remove tags” to clean up one or more tag assignments without changing other subscriber data.
To remove tags:
- Select the required subscribers.
- Open “Bulk Actions”.
- Select “Remove tags”.
- Select one or more tags.
- Click “Remove tags”.
Maildroppa removes only the selected tags that are actually assigned. Every other tag stays unchanged.
Unlike adding tags, removing tags is available for subscribers in any status. This lets you clean up old assignments on Pending, Unsubscribed, Cold, Bounced, Soft Bounced, or Blocked subscribers as well.
After the action, the result tells you:
- How many subscribers were updated
- How many did not have any of the selected tags
- How many were skipped
Removing a tag through a customer bulk action can start an active Automation that uses “Tag is Removed” as its trigger.
Using an Email List Instead of Table Selection
The table workflow is best for a manageable group you can identify with a status filter or email search.
For a long list copied from a spreadsheet, CRM, event platform, or another external source, open “Settings” → “Subscriber Fields” and use “Bulk Tagging per Email List”. That workflow accepts email addresses, provides a preview, and reports invalid, missing, ineligible, or unchanged entries before the final update.
Read the Subscriber Fields and Tags guide for the complete email-list bulk tagging workflow.
Exporting All Subscribers
Open “Bulk Actions” and select “Export All” to export the complete subscriber list in your account.
The word “All” is important. The export is not limited to the currently displayed status, search result, page, or checked rows.
Maildroppa prepares the export in the background. You can continue using the application while it is generated. You receive an email when the export is available.
Read the Exporting Subscribers guide for details about the exported data and file handling.
Adding Subscribers
Open “Add a New Subscriber” above the table. The menu provides two options.
Add a Single Subscriber
Select “Add a Single Subscriber” to open a new Subscriber Details page.
Enter the required email address and any useful profile fields or tags. Before Maildroppa creates the subscriber as Confirmed, you must confirm that you have permission from the email user to add the address to your subscriber list.
Do not use manual creation to bypass a signup or Double Opt-in process. You are responsible for having a valid legal basis and retaining the evidence required for your audience and jurisdiction.
Import from File
Select “Import from file” to open the import wizard. Use this option when you need to add or update many subscribers from a structured file.
The wizard lets you upload the file, map its columns, choose profile fields and tags, validate the contents, and review the import before applying it.
Read the Import Subscribers from a File guide before importing a new source.
If your plan’s subscriber limit has been reached, Maildroppa shows an alert and disables the “Add a New Subscriber” button. Remove records you no longer need or change the plan limit before adding more contacts.
Deleting Subscribers
Deleting subscriber data is permanent. Export any data you are required to retain and check connected campaigns, Segments, Automations, reports, and external systems before continuing.
Delete One Subscriber
Open the three-dot menu on the subscriber’s row and select “Delete”.
Warning: The individual row action does not show a second confirmation dialog. Once the action is accepted, Maildroppa deletes the subscriber immediately.
Open the subscriber profile and verify the email address before using this action if similarly named contacts exist.
Delete Selected Subscribers
To delete several specific subscribers:
- Select the required rows.
- Open “Bulk Actions”.
- Select “Delete Selected”.
- Review the warning.
- Click “Delete” to confirm.
Only the checked subscribers are deleted. The confirmation dialog explains that the action cannot be undone.
Delete All Subscribers
“Delete All” permanently deletes every subscriber from the account. It is not limited by the status filter, search, current page, or checked rows.
To reduce the risk of an accidental account-wide deletion, Maildroppa requires you to type the exact confirmation phrase DELETE ALL before the Confirm button becomes available.
After confirmation, deletion continues in the background. A progress message is shown while Maildroppa processes the complete list.
Use “Delete Selected” when you intend to remove only the rows you can see. Never use “Delete All” as a shortcut for deleting one filtered status group.
List Audits and Temporarily Unavailable Actions
Maildroppa can place bulk subscriber changes behind a manual list audit. This protects sending quality when a list requires review.
If an audit is in progress, Maildroppa opens the audit information dialog instead of immediately starting an import, export, selected tag action, or deletion. Wait for the audit to finish and then run the intended action again.
An audit pause does not mean that the selected records or tags were changed. Always check the final success message before assuming that a bulk action completed.
Recommended Workflow
Use this sequence when managing a subscriber group:
- Decide exactly which contacts should be affected.
- Select the appropriate status filter.
- Search by the beginning of the email address if you need to narrow the list further.
- Increase the page size if the group contains more than 20 visible rows.
- Select the required rows and verify the selected count in the tag dialog or delete warning.
- Review whether tag changes can start an Automation.
- Run the smallest appropriate action.
- Read the result message and investigate unchanged or skipped contacts.
- Open a sample subscriber profile to verify the result.
For an account-wide destructive action, create an export first and confirm that “All” really is the intended scope.
Troubleshooting
The Subscriber Does Not Appear in Search
The search matches the beginning of an email address and respects the current status filter. Search from the first character of the address and switch to “All Subscribers” if you do not know the current status.
Add Tags Says That I Must Select a Subscriber
“Add tags” and “Remove tags” operate only on checked rows. Select at least one subscriber before opening the action.
No Tags Are Available in the Dialog
Create or restore an active customer tag under “Settings” → “Subscriber Fields”. System Tags and archived tags are deliberately excluded from manual bulk selection.
Some Subscribers Were Skipped When Adding Tags
Only Confirmed subscribers are eligible for new tag assignments through bulk tagging. Change the list to Confirmed Subscribers before selecting rows if the tag should only be applied to eligible contacts.
Do not change a subscriber’s status merely to force a tag assignment. The status represents consent and deliverability state and should remain accurate.
The Tag Was Not Removed from Every Selected Subscriber
The result distinguishes updated subscribers from subscribers who did not have any selected tag. Other, unselected tags are never removed by the action.
The Report Shows No Data
Check the selected date range. The report only contains data between account creation and the current day. Also try a shorter range and Day or Week grouping.
A Bulk Action Opens an Audit Dialog
A manual list audit is currently in progress. The requested data change has not started. Wait for the audit to finish, then repeat the action and check for its success message.
I Cannot Add a New Subscriber
If the button is disabled and a plan-limit alert is visible, the account has reached its current subscriber allowance. Resolve the limit before creating or importing more subscribers.
Continue with the next task
These guides and articles connect directly to the workflow on this page.
- Review subscriber details and activity
Edit profiles and inspect deliveries, opens, clicks, bounces, and complaints.
- Manage subscriber fields and tags
Create structured data, organize tags, and update subscribers in bulk.
- Set the subscriber language
Choose the language used for subscriber-facing footer links.
- Manage subscribers with Maildroppa
Connect subscriber records, fields, tags, activity, and bulk actions in the full product workflow.
Ready to Send Better Emails?
Stop juggling bloated tools or overpriced plans. Maildroppa offers personal support, privacy-conscious controls, and powerful email marketing - starting free forever.
No credit card required. No time limit.