Chapters
- Signup Form Builder: Design Forms
- Build and Publish Landing Pages
- Build and Embed Signup Forms
- Create and Display Popup Forms
- Create and Position Slide-in Forms
Contents
the email tool that makes email marketing simple


Create and Display Popup Forms
Published: · Last updated: · By Marcus Biel
In brief
Learn how to design a Maildroppa Popup, set its delay and frequency, use exit intent or a click trigger, embed it on your website, and test its behavior.
A Popup is displayed above the content of your website. It places the signup offer in the visitor’s direct line of sight while leaving the underlying page in place.
Popups are useful for newsletter offers, discounts, event registrations, lead magnets, and other focused calls to action. Because they interrupt the normal page experience, the timing and frequency are as important as the design.
This guide explains the Popup-specific settings. Layouts, content blocks, subscriber fields, tags, typography, layers, and signup flows are covered in the main Signup Form Builder guide.
Creating a Popup
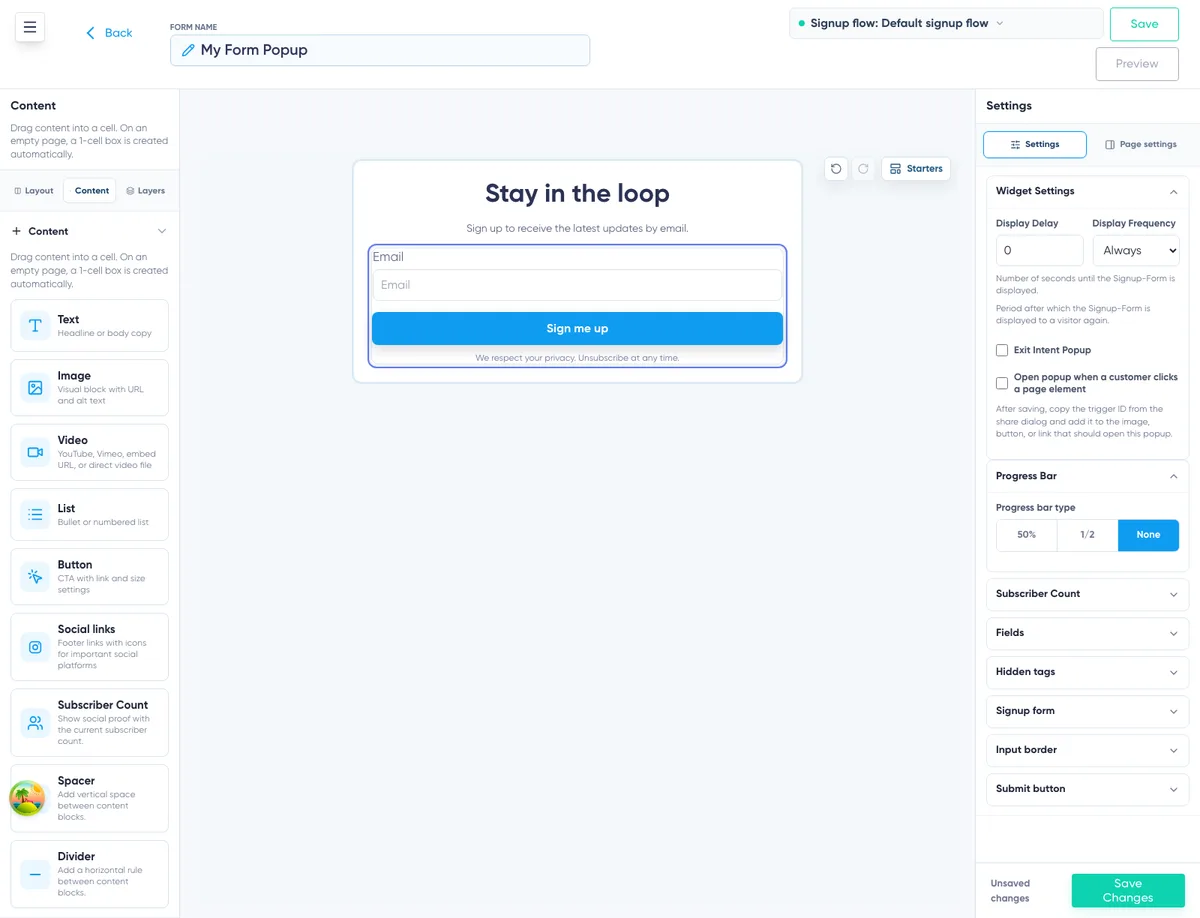
Open “Signup Forms”, click “Create Form”, and select “Popup”. Enter a clear internal name and continue to the builder.
You can also edit an existing Popup by clicking its name in the Signup Forms Overview.
Use a name that explains the offer or placement, such as “Homepage Discount Popup”, “Webinar Registration Popup”, or “Guide Download Popup”. The internal name is not automatically shown to visitors.
Choosing a Popup Template
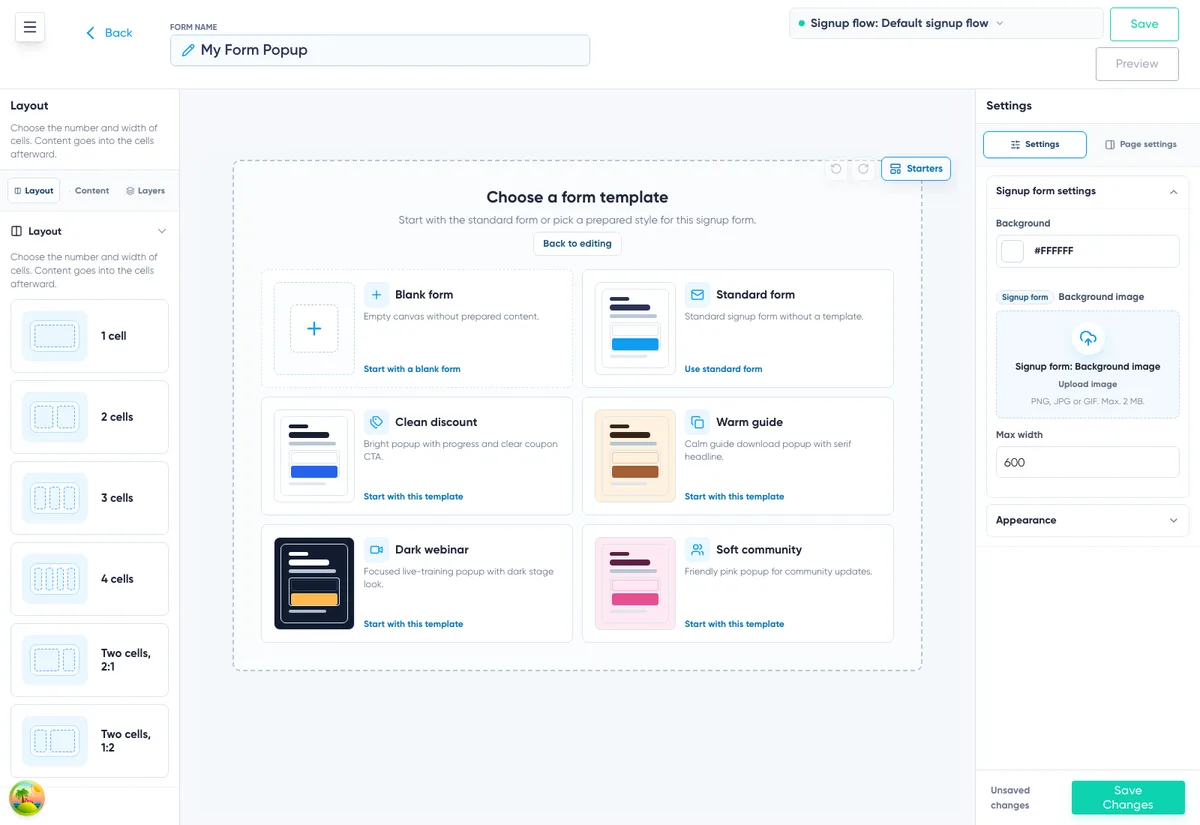
Popups offer a blank form, a standard form, and four designed templates:
- Clean discount
- Warm guide
- Dark webinar
- Soft community
Choose a template whose size and content structure fit the offer. All text, fields, colors, images, spacing, and layout can be changed afterward.
Designing the Popup
Use the visual builder to arrange the Popup. You can combine the signup form with text, images, video, lists, buttons, social links, a subscriber counter, spacers, and dividers.
Keep the main message short enough to understand immediately. A clear heading, one brief explanation, and a specific submit button are usually more effective than several competing messages.
Select the signup form block to configure fields, required information, hidden tags, progress indicator, subscriber counter, inputs, and submit button. Open “Page settings” to change the overall Popup background and appearance defaults.
The Popup appears over the website with a close control. Leave enough visual space around important text and fields so that the form remains easy to use on a small screen.
Configuring Popup Behavior
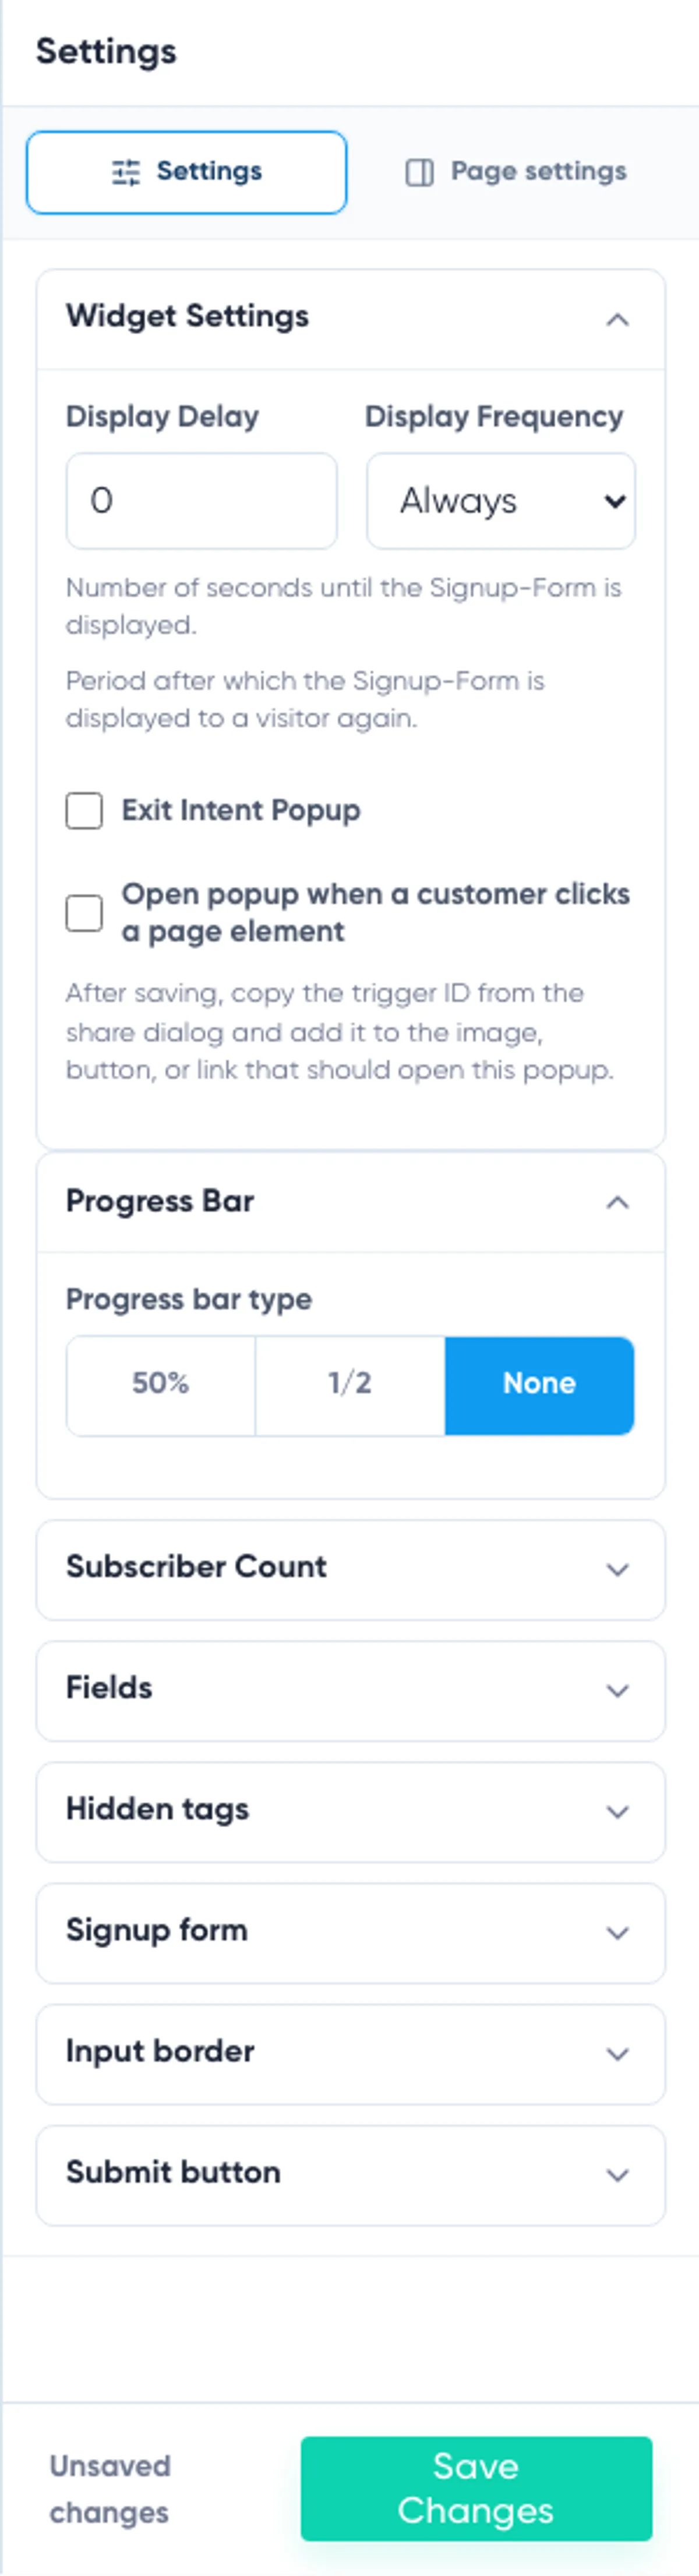
Select the signup form block and open “Widget Settings”. This section controls when the Popup is shown and how often a visitor can see it.
Display Delay
“Display Delay” defines how many seconds Maildroppa waits before displaying the Popup on an embedded website page.
Enter 0 to show it without an additional delay. Use a larger value when visitors should have time to read the page before the offer appears. The builder accepts a delay of up to 86,400 seconds.
Choose the delay based on the page. A short delay may be appropriate on a focused campaign page, while a longer delay can feel less disruptive in an article.
Display Frequency
“Display Frequency” controls the period after which the Popup can be displayed to the same visitor again. The available options are:
- Always
- Once per hour
- Once per day
- Once per week
- Once per month
Use “Always” carefully. A Popup that repeatedly interrupts the same visitor can become frustrating. A daily or weekly frequency is often a better starting point for a general website offer.
The frequency is stored in the visitor’s browser. Testing in another browser, private browsing window, or cleared browser storage can therefore produce a different result.
Using Exit Intent
Enable “Exit Intent Popup” when the Popup should be opened after the visitor moves the pointer out of the page area, indicating that they may be about to leave.
When exit intent is enabled, the Popup waits for this behavior instead of following the normal delayed display. The selected display frequency still prevents it from being shown again too soon.
Exit intent is based on pointer movement and is therefore mainly relevant on desktop and laptop browsers. Touch devices do not provide the same exit signal. Always make sure that mobile visitors can still discover your signup offer through the page itself or another appropriate form.
Opening a Popup Manually from a Page Element
A Popup can open when a visitor clicks a specific button, image, or link on your website. This is the manual click trigger. It is different from “Exit Intent Popup”, which reacts when a visitor moves the pointer out of the page.
Configure and install the manual click trigger as follows:
- Open the Popup in the Signup Form Builder.
- Click the signup form block on the canvas and open “Settings” on the right.
- Expand “Widget Settings” and enable “Open popup when a customer clicks a page element”.
- Click “Save changes”.
- Return to the Signup Forms Overview and activate the Popup if it is inactive.
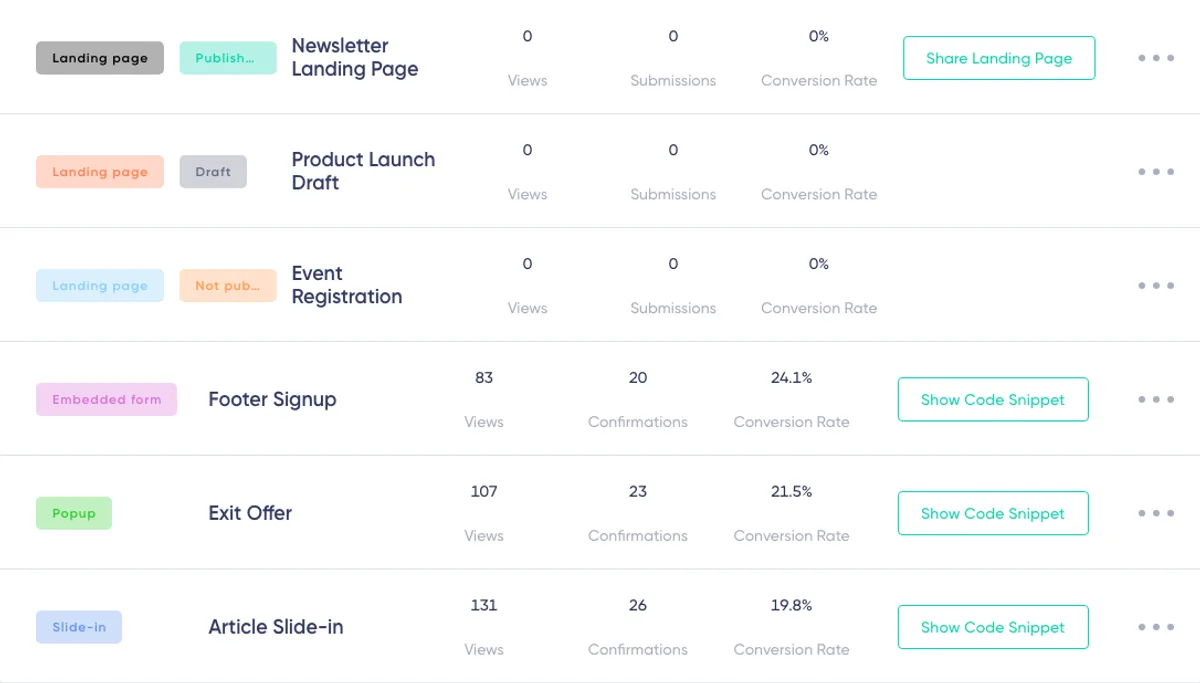
- Click “Show Code Snippet” in the row of that Popup.
The dialog contains the two values required on your website:
- Copy the complete code from the “JavaScript” tab and add it to the website page on which the Popup should be available.
- Below the code, copy the ID shown under “Add this ID to element from which you want to manually trigger Popup”.
- Add that exact value to the
idattribute of the button, image, or link that should open the Popup.
The ID follows this format:
maildroppa-popup-btn-[form-id]
For example:
<button id="maildroppa-popup-btn-[form-id]">Get the guide</button>
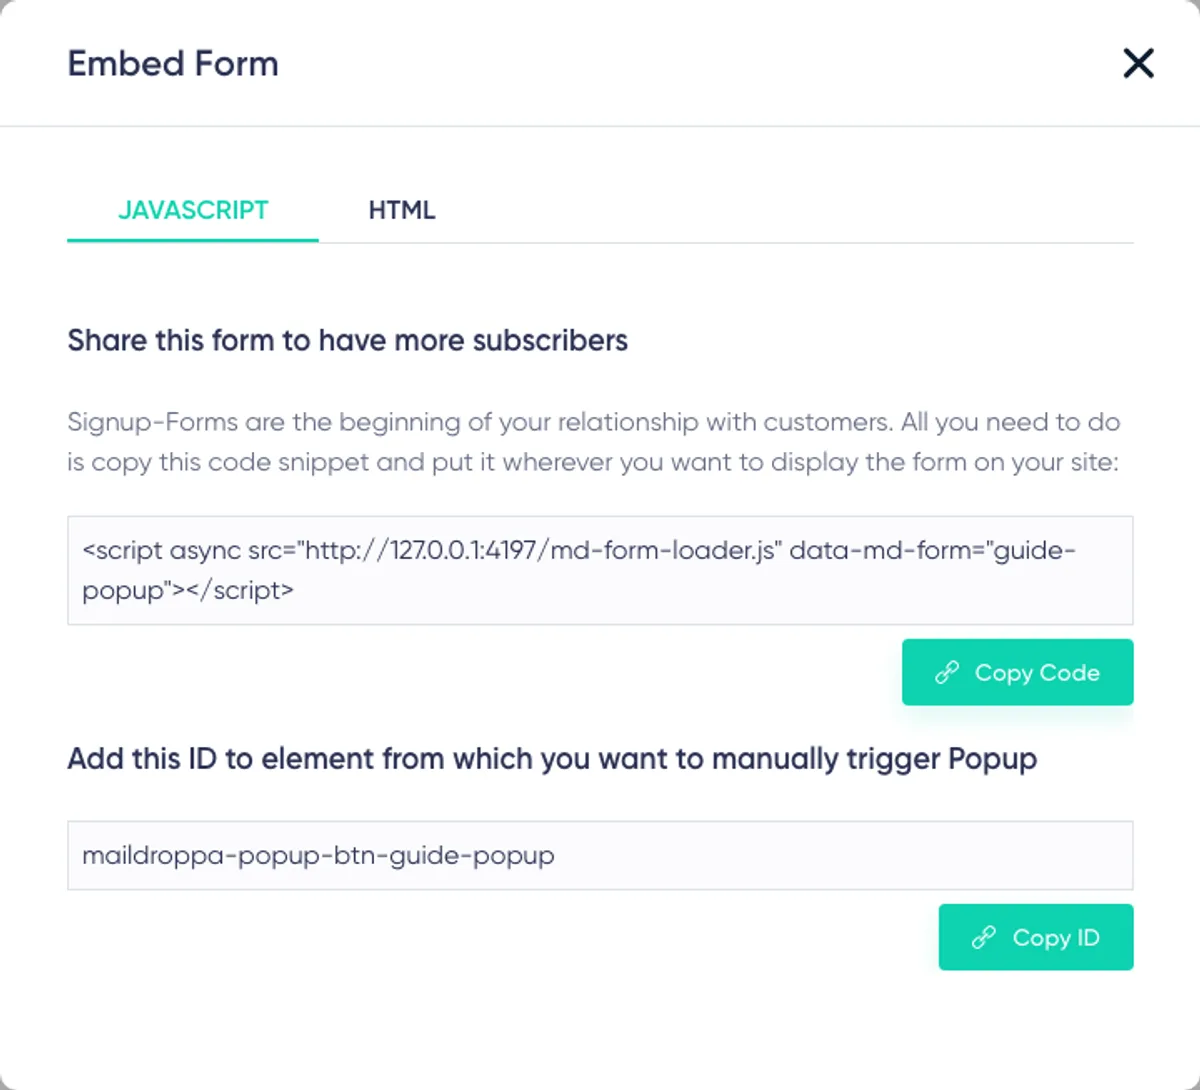
The JavaScript loads the Popup. The ID connects the Popup to the selected page element. Both must be present on the same published page. When a visitor clicks the element with that exact ID, the Maildroppa script opens the Popup.
If your website button already has an ID from another popup system, replace it with the Maildroppa trigger ID when Maildroppa should handle the click. Do not place the Maildroppa Popup inside a second popup supplied by your website builder.
Use each HTML ID only once per page. If several elements should open the same Popup, ask the person implementing the website to connect those elements without duplicating the same ID.
Connecting the Signup Flow
Review the assigned signup flow in the builder header. It controls the immediate submit response, the Double Opt-in email, and the result after confirmation.
You can select an existing flow, edit it, or create a separate flow for this Popup. A dedicated flow is useful when the offer needs its own confirmation message or lead magnet delivery.
Previewing and Saving
Click “Preview” to check the Popup design and behavior without changing the version used on your website. Review the layout, close control, field order, validation space, and submit response.
Click “Save changes” when the Popup is ready. Then return to the Signup Forms Overview.
Activating and Embedding the Popup Automatically
Activate the Popup from its three-dot actions menu if it is not already active. Then click “Show Code Snippet” and copy the complete code from the “JavaScript” tab.
Add the script to every website page on which the Popup should be available. The code contains the Popup’s unique form ID and loads its current saved configuration.
The “HTML” tab provides the generated markup for custom implementations. If you use it, test all behavior and submission steps carefully because your website code and styles can affect the result.
This section applies when the Popup should open automatically based on its display delay or exit-intent behavior. For a button, image, or link that opens the Popup on click, follow
For general embedding instructions, see Building and Embedding an Embedded Form.
Testing the Popup on Your Website
Test the Popup on the real website page after adding the code:
- Check the configured delay.
- Test the close button and clicking outside the form.
- If enabled, move the pointer out of the page to test exit intent.
- If enabled, click the configured page element to test the manual trigger.
- Check the layout on a narrow screen.
- Submit the form and complete the Double Opt-in process.
- Verify the subscriber and hidden tags in Maildroppa.
The frequency setting may stop the Popup from appearing again during repeated tests. Use a private browsing window or clear the relevant browser storage when you need a clean test visit.
Updating or Deactivating the Popup
To update the Popup, open it in Maildroppa, edit the design or behavior, preview it, and click “Save changes”. The JavaScript snippet continues to use the same form ID.
To stop displaying it temporarily, choose “Deactivate” from the actions menu. Deactivation preserves the Popup and its previous report data. Remove the script or trigger element from the website as well if they are no longer needed.
Ready to Send Better Emails?
Stop juggling bloated tools or overpriced plans. Maildroppa offers personal support, privacy-conscious controls, and powerful email marketing - starting free forever.
No credit card required. No time limit.